Skip the Studio: How $3 in Foam Board Fixed My Product Photos
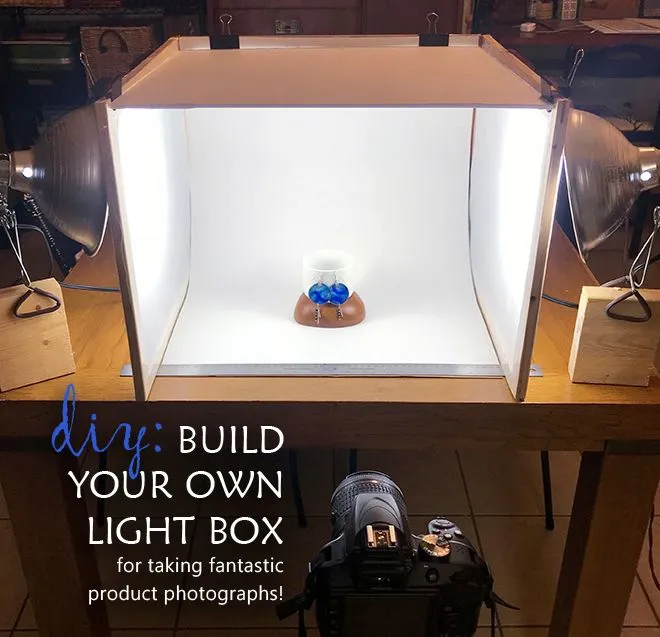
Photo: DIY product photography setup foam board window light homemade lightbox, via i.pinimg.com
When I started selling handmade goods on Etsy, I assumed decent product photos required a studio. I priced out softboxes, a light tent, backdrops, and tripods, and the total hovered around $250 before tax. Then a photographer friend looked at my listing photos and said something that stung: "You're missing a $3 piece of foam board."
She was right. Six months and hundreds of sales later, my entire shooting setup still fits in a kitchen drawer. Here's how to build it.
The Core Problem: Harsh Light, Not Bad Gear
Most amateur product photos fail for one reason — the light is doing something ugly. Overhead kitchen lights create hard shadows under every bump and edge. Window light from one side turns half your product into a black void. Your camera (even a great phone camera) can't fix what the light is doing wrong.
The fix is diffusion and fill. Diffusion softens the light source; fill bounces light back into the shadows. Professional gear does both, but so does stuff you already own.
The DIY Kit, Item by Item
- Foam board ($3 at any craft or dollar store): This is your bounce card and your backdrop. One white sheet brightens shadows dramatically when angled toward your subject.
- Parchment paper (pantry): Tape it over a bright window or in front of a lamp and you've built a diffuser that rivals a $60 softbox.
- Your phone's flashlight: Modern phone flashlights are bright, consistent, and steerable. Prop the phone against a mug and aim.
- A window on the shady side of the house: North-facing light in the US is famously soft and steady — free studio lighting, all day.
- Books or cereal boxes: Instant risers and light stands. Nobody sees them in frame.
Total new spend: three dollars. Maybe four if you grab a second foam board for a seamless sweep (bend it against a wall so backdrop and surface blend into one curve — that's the trick behind those "floating product" shots).
Two Setups That Cover 90% of Products
Setup 1: The Window Lightbox. Put your product on a table near a bright window. Tape parchment paper over the glass. Set the foam board on the shadow side, angled inward. Shoot from slightly above with your phone's tap-to-expose set on the product.
Setup 2: The Flashlight Sweep. In a dim room, tape parchment across the front of a lamp or hold your phone flashlight behind it. Sweep the light across your product slowly while shooting a burst. Pick the frame where highlights look creamy, not blown.
Before and After: What Changes
The first time I compared old and new shots side by side, the difference was almost embarrassing. Shadows went from muddy gray blobs to soft gradients. Colors stopped shifting weirdly. The product looked like something a brand shipped, not something photographed on a kitchen counter at 11 PM.
The real kicker? My click-through rate on Etsy listings rose noticeably within two weeks. Same products. Same prices. Just light that behaved.
When You Should Still Buy Gear
I won't pretend the DIY kit is forever. If you're shooting reflective items like jewelry, glassware, or anything glossy, diffusion gets tricky and a proper light tent earns its keep. And if you're shooting dozens of SKUs weekly, consistent output matters more than thrift. But for the first fifty products — the ones that decide whether your shop lives or dies — the drawer kit is genuinely enough.
The Editing Pass That Ties It Together
A clean capture still needs a light touch in your editor: nudge exposure, lift shadows slightly, correct white balance against something neutral in frame, and crop tight. Five minutes, tops. The goal is to remove distraction, not to rescue a bad photo — and with the right light, there's nothing to rescue.
Your product photos don't need a studio. They need one soft light source, one bounce, and three dollars. Everything else is practice.